


ZOIPER SoftPhone
Author: Jeffrey Schmid
Version: 25.07.2022
introduction #
With Winet's Virtual PBX, you can also put your phone line into operation on your smartphone.
This way, you can always be reached via your landline number and can also make calls on the road with your landline number
requirement #
- Smartphone with Android v6.0 or higher
- iPhone or iPad with iOS 12.0 or higher (iPhone 5S or higher), (iPad Air 2017 or higher)
- Internet access via WLAN or mobile data (4G)
Note on energy-saving modes of current smartphones #
Depending on the manufacturer and Android version, there are various settings and implementations that allow saving energy on the device and extending the runtime. Some of these methods are very aggressive and literally freeze an app. Therefore, it may happen that you are not accessible via Zoiper, even though the app has been configured properly. You can find out which settings and options your smartphone offers from the manufacturer of your device.
installation #
You can use ZoiPer for your PC as well as for your smartphone.
If you are using an IOS device, you can download the latest ZoiPer app from the app store.
For an Android device, you can find the ZoiPer app in the PlayStore.
However, if you want to use ZoiPer on your PC, you can click on the following link
https://www.zoiper.com/en/voip-softphone/download/current
configuration #
Account Login #
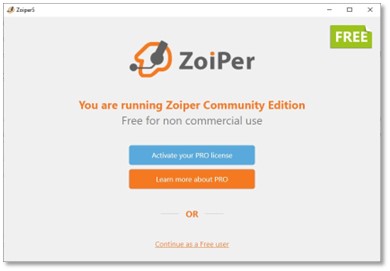
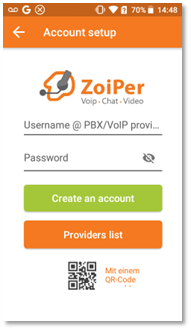
After installation, open the ZoiPer application. And choose the appropriate version.
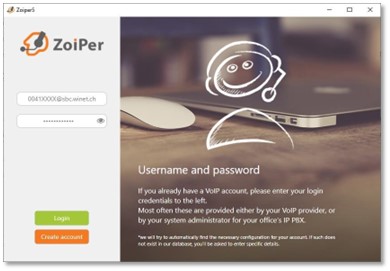
If you have already obtained a phone number from us, you can set it up now:
Under Username / Login enter the extension or your phone number @Registrar.
You will find the password on your PBX or at my.winet.ch and at the end on "Login".
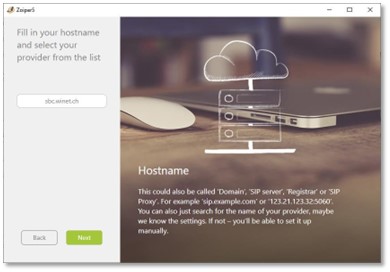
In the next step, you need to enter the hostname. If you have an installation with us, enter the hostname of your installation here. If you have a direct connection through us, then the hostname is: sbc.winet.ch.
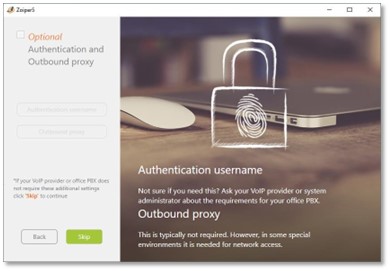
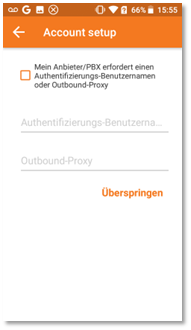
You do not need to enter anything else here. Just click on "Skip
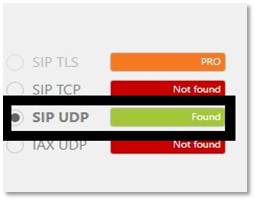
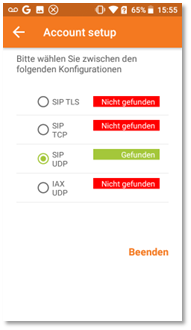
Finally, select the "SIP UDP" option. You can now make phone calls.
Configuration IOS #
Account Login #
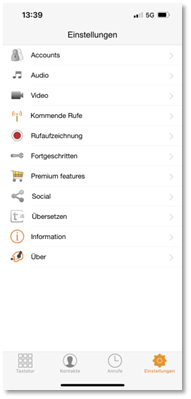
At Settings/Settings Press
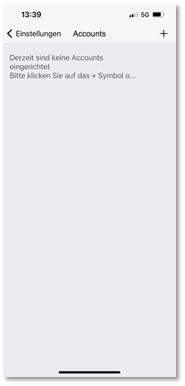
At Accounts click.
Top right on the "+" Press character. You will now be asked if you already have an account. Press Yes / Yes and then confirm with "Manual Configuration"Continue. As account type "SIP account" selected.
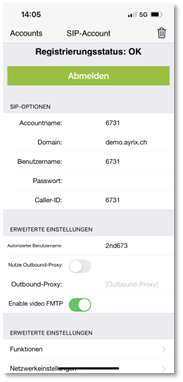
At "SIP options" the login data are entered (the picture is only an example).
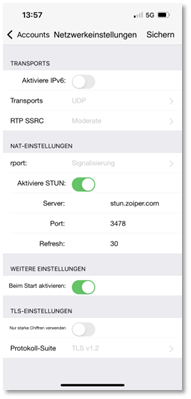
Advanced settings #
Under the network settings you only have to enter "Enable IPv6" switch off.
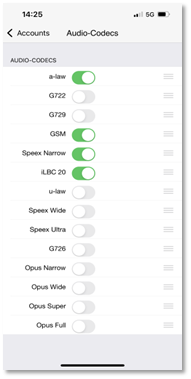
For the audio codecs you have to select "a-law"Move it to the top by means of the three dashes on the right. G722 comes right after that. "u-law" must leave them switched off.
Android configuration #
Account Login #
Right at the start of the application, the wizard will ask you to enter the provider's login data. The username must be in the following format:
NUMMER@sbc.winet.ch (e.g. 0041565202020@sbc.winet.ch). The hostname does not have to be sbc.winet.ch. It can also be the domain name of your hostedPBX, depending on the product you have ordered from us.
The password can be taken directly from the SIP account in myWinet or from the password sent by us.
After you have entered the login data, you will be asked whether you want to enter an authentication username or outbound proxy. You can skip this step.
The corresponding SIP configuration is negotiated in the next step. Select "SIP UDP". Afterwards, the configuration wizard can be closed with the "Exit" button.
Access permissions like "May ZoiPer access your microphone" are automatically allowed by the Android system.
Advanced settings #
If you go back to the main menu, you will have three dashes at the top left. Click there and call up the settings.
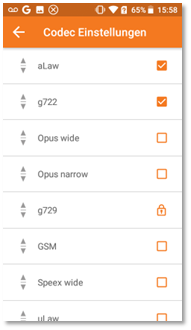
Under Accounts you will find, among other things, the "Codec Settings". Disable everything except a-law and g722 and move it upwards using the arrows on the left edge.
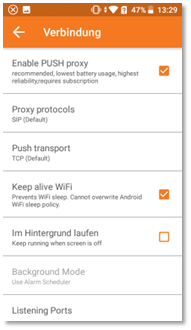
What you can also activate is the PUSH proxy. To do this, go back to the settings under Connectivity / Connection.
Important information #
Multiple registration #
The hostedPBX does not support multiple registration. So if you want to call on one number and it rings on your mobile and on the desk phone I recommend you to enable parallel ringing or create a ring group/queue with the users who should ring.
Display format #
This is a setting of the phone and not of the app itself. Each phone has its own setting here. There are also differences in Android models. A Samsung and a Xiaomi are similar but not exactly the same. Here you have to research yourself how it works on your phone.
User configuration #
If you want us to create the user for you and register it with you, it will be charged. If you have questions about the rates and costs, then click on the link: https://www.winet.ch/privatkunden/support/


